Home > Help Guides > NetSync Configuration Instructions
NetSync Configuration Instructions
ReQuest’s unique NetSync architecture allows the customer’s music collection and playlists to synchronize to their units anywhere in the world over the Internet. This is very useful if the customer has multiple homes or work environments where they want complete access to their entire music collection. It is also ideal for commercial applications with multiple franchise locations.
Guidelines |
For perspective, a single song can be anywhere from 15 MB (MP3) to 60 MB (WAV), and multiplying that by about 10 for an album. On a solid broadband connection, 3 minutes per song, or half an hour per album is typical. |
Terminology Chart | ||
| Between different Operating Systems our terminology has evolved. To better assist in understanding instructions based on the software version, follow the chart below: | ||
| Unit that controls the media content. Media can be added and removed and metadata modified by the user. | Unit that is a copy of the main unit. Media cannot be modified in anyway by the user. Any modifications happen automatically in the NetSync process to match the main unit. | |
| Software 1.9.32 or lower | Master | Slave |
| Software 2.X.X | Pro | Zone |
| Software 3.X.X or higher | Server | Client |
Port Forwarding | ||
| In order to have the units NetSync between two locations, the ports must be forwarded at the Pro location. It is recommended to forward ports at both locations for remote access, but only required for the Pro: | ||
| Software 1.9.32 or lower | Ports:
| |
| Software 2.X.X | Ports:
| |
| Software 3.X.X or higher | Ports:
| |
| To Port Forward, follow our How to Port Forward guide for instructions | ||
Configure to Report to ARQLink |
| For NetSyncing, it is highly recommended to NetSync using ARQLink regardless of the NetSync being between units on the same network or over the web. To create an ARQLink account and configure your unit to report to that account, follow our ARQLink Consumer Management Guide. Using the first three sections in the guide you can create an account, set the server to report to that account and confirm that the unit has reported successfully to the account. You will only need one ARQLink account for all the units that belong to the one customer. Repeat this for each unit that will be part of the NetSync configuration. |
Configure Client/Zone | ||
| ReQuest no longer offers units that are configured as a Zone only. If you wish to have a unit behave as a client/zone, In the case of a Pro, you would need to manually configure the server as a client/zone. These servers would include: ARQ2 Pro, Fusion Pro, Nitro Pro, Tera Pro, N.Series, F.Series, S.Series and IMS.Series (iQ). Instructions below for units running SPOS. | ||
 | Open the Web Server | |
 | Click on Settings | |
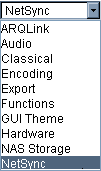 | From the Drop Down pick NetSync. | |
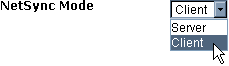 | To change a Pro/Master to a Client, change the NetSync Mode to Client and click Submit. | |
 | Once the unit is set as a Client, or is already a Client, set NetSync Master Location to Use ARQLink. | |
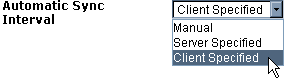 | It is recommended to set to Automatic Sync Interval to Client Specified if there are no Task Manager start and end times. Otherwise if there are restricted times to perform Task Manager tasks, set to Server Specified. If set to Manual, the NetSync would have to be manually initiated each time. | |
 | Adjust the Client Inverval (days) to how often the NetSync should check for changes when set to Client Specified. If set to Server Specified, by default it will check every five minutes. | |
| Adjust the Maximum Transfer Rate if the network connection is slow (DSL or Satellite). | ||
 | Submit after setting all settings. | |
Update ARQLink to Specify NetSync Master | ||
 | Once both servers are configured with the ARQLink user name and password, open your browser go to www.arqlink.com | |
 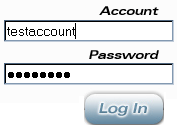 | Type in the user name and password. | |
 Once the ARQLink account loads, click on the Account name on the left. You will see all the units displayed in the center of the screen. The Client unit will have a drop down box for NetSync Master. Pick the Name of the Master unit. | ||
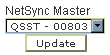 | Once selected, click on Update. | |
Initiate the NetSync on Client | ||
| Software 1.9.32 or lower | Using the IR remote and viewing the video output of the client unit (or LCD if applicable), press Menu -> NetSync -> Begin NetSync Now. Select OK when warned "About to sync database!" | |
| Software 2.X.X | Using the IR remote and viewing the video output of the client unit (or LCD if applicable), press Menu -> NetSync -> Begin NetSync Now. Select OK when warned "About to sync database! | |
| Software 3.X.X or higher | Using the IR remote and viewing the video
output of the client unit (or LCD if applicable), press Menu ->
NetSync -> Start NetSync. OR Load the web server and click on Settings -> Pick Task Manager from the drop down -> Click on Start for NetSync® Client. | |
See also
NAS Guide
Web Camera Guide
Server Network Configuration Guide
Using the Legacy Interactive Remote
Backing up and Restoring Playlists
Finding Custom Streaming Radio Stations
How to verify Blu Ray ISO file
How to Port Forward
How to Run a Software Update
Bandwidth Usage
Keyboard Shortcuts
How to find the MAC Address of a Computer
How to Calibrate ReQuest Touch Screens
Advanced Web Server Editing w/ Foxreplace
Configuring Lutron Lighting Control