Home > Help Guides > Web Camera Guide
Web Camera Guide
Below are some specific tips for getting web cameras to work with the iQ or F.Series with IMC.
| Using Web Camera Links from Websites | ||
| Network/Internet webcams that work by refreshing a static image can be added to the iQ and F.Series to display on the TS.15 (iQ only), TS.N panels and IMCs. Not all web cameras will work however. Cameras that use Macromedia Flash and Windows Media Video streams for example will not work. | ||
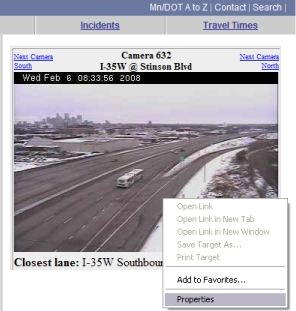 | To add a camera, navigate to the website that has it. Right click on the image to reveal its properties. | |
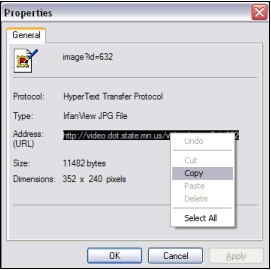 | When the properties are displayed, copy the URL it displays for the image. | |
 | Load the ReQuest web server Settings page and select Widgets. | |
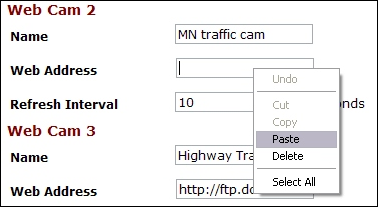 | Give a name for the web camera, and paste the URL into the "Web Address" field. | |
| . Axis Cameras | ||
| AXIS cameras allow you to set the image type (Single or Motion) as well as the resolution. For best results, we recommend Single mode at the highest possible resolution. | ||
|
| Panasonic Cameras | ||
| By default Panasonic cameras use what is known as a Motion JPEG image. Essentially, what this does is create a constant stream of images to the browser when a single image request is made. This type of image is not supported by the ReQuest system. However, Panasonic cameras have a hidden URL that allows you to access a single JPEG image. | ||
|
| Handling Web Cameras with Username and Password | ||
| If the camera is setup to prompt for a username and password, add username:password at the beginning of the URL. For example, if the username is "frontdoor" and the password is "12345", on a Panasonic camera (at 192.168.1.25) the URL might look like: http://frontdoor:12345@192.168.1.25/SnapshotJpegResolution=640x480&Quality=Standard |
See also
NAS Guide
Server Network Configuration Guide
Using the Legacy Interactive Remote
Backing up and Restoring Playlists
Finding Custom Streaming Radio Stations
How to verify Blu Ray ISO file
How to Port Forward
How to Run a Software Update
NetSync Configuration Instructions
Bandwidth Usage
Keyboard Shortcuts
How to find the MAC Address of a Computer
How to Calibrate ReQuest Touch Screens
Advanced Web Server Editing w/ Foxreplace
Configuring Lutron Lighting Control