Home > Manuals > iQ Whole House Entertainment > IMS Media Server > Installing the iQ IMS
Installing the iQ IMS
| Front of iQ IMS | ||
| ||
 | Power Light- illuminates blue when the server is turned on. | |
| | IR Window - location where infrared signals are received. | |
| | Status Light
| |
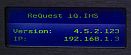 | LCD Display - Displays IP address and software version of the server. The configuration menu can be accessed to change the network configuration. | |
| | Front Power Button - Turn the server on/off. The Rear Power Switch located on the back of the chassis must also be switched to the on position for the ReQuest server to power on. | |
| | CD/DVD ROM Drive - Used for archiving music CD's and Movie DVD's (for systems equipped with ReQuest Intelligent Media Client). | |
| | Eject Button - ejects CD/DVD ROM Drive. This will not function while the Status Light pulses green-red. | |
| | Thumb Screws - used to remove or secure the faceplate of the server. | |

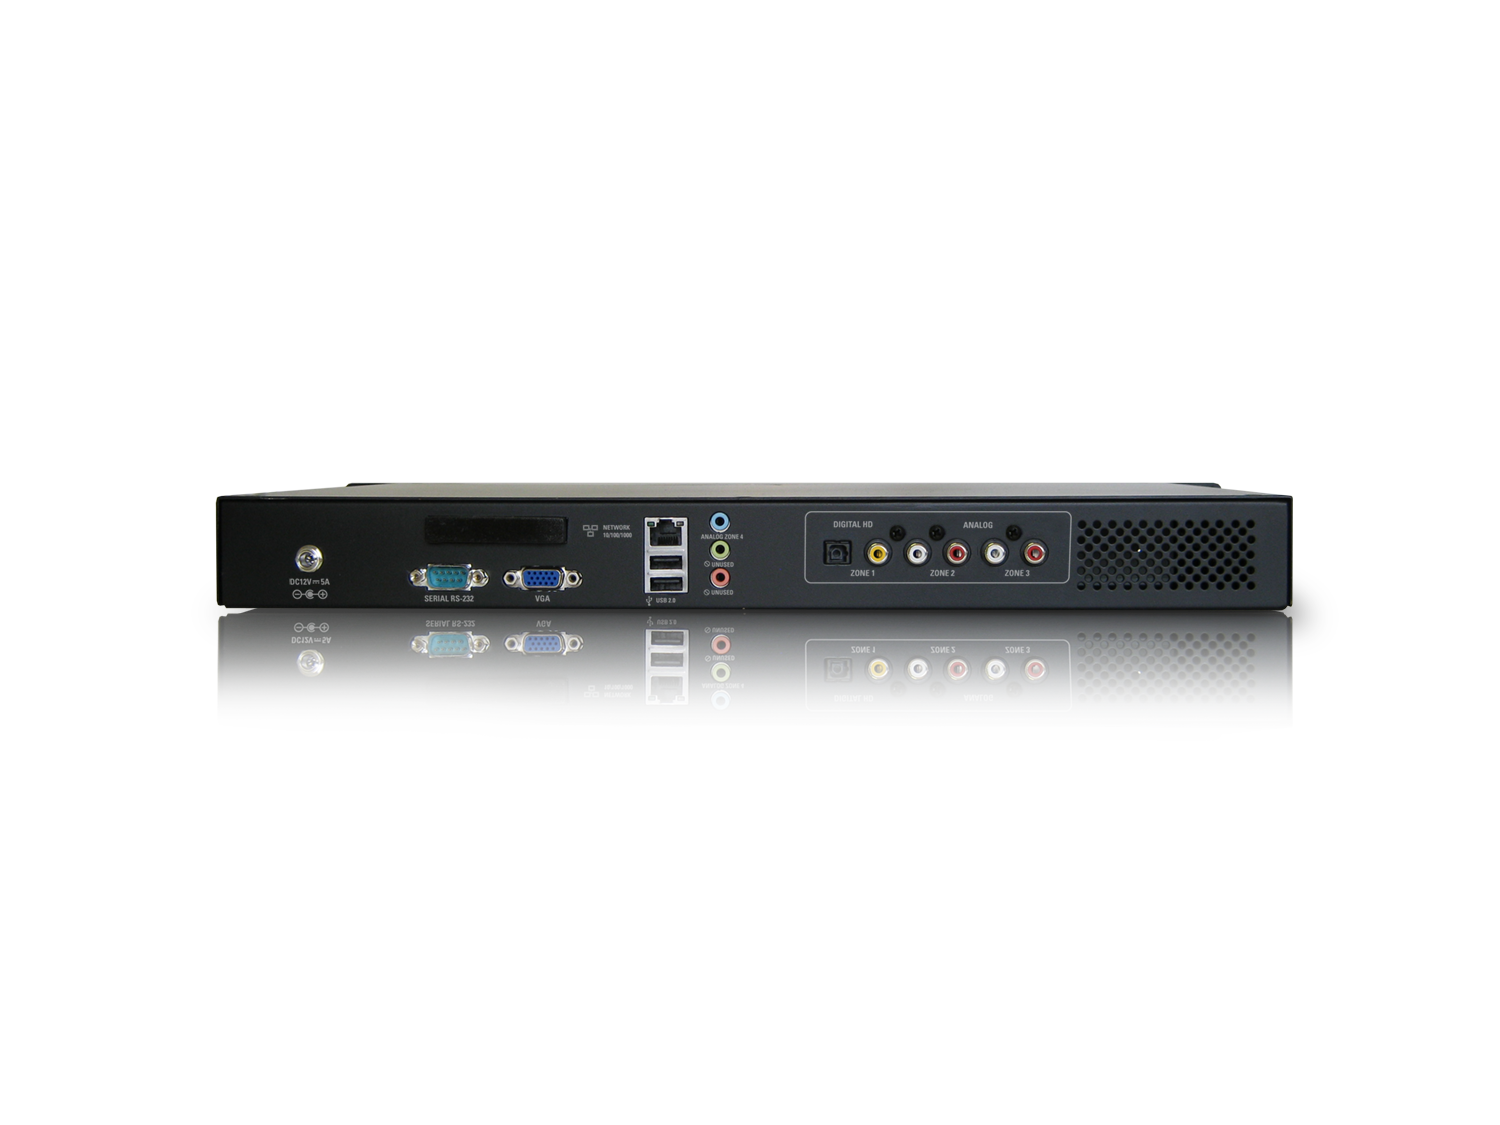
| Back of iQ IMS | ||
| ||
 | DC Power Connector - Connect to either 110 volt or 220 volt. The ReQuest server will automatically detect and switch between 110 or 220 volt power systems. | |
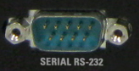 | Serial - Used for home automation systems that can be programmed to control the ReQuest server via RS232 Serial. | |
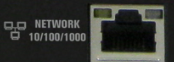 | Ethernet Port - Connects the ReQuest server to the local network and Internet. Capable of 10Mbps/100Mbps/1000Mbps. Also used for home automation systems controlling system over the network. | |
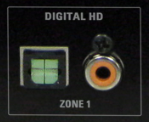 | Digital Audio - The Optical and Coaxial connectors are for zone 1, the HD zone. | |
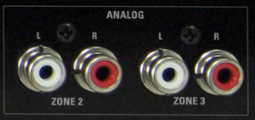 | Analog Audio - Analog audio connectors for zone 2 and 2 of the F3+HD. | |
 | Analog Audio - Analog audio connector for optional 4th zone of audio (3rd analog zone). Must use included Y-adapter. | |
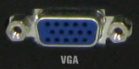 | VGA - Used for video out. VGA can be converted to composite with the Grandtec GXP-2000 or to component with other adapters in the market. | |
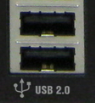 | USB - Optional additional USB port: Can be used for IR receiver or keyboard | |
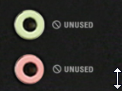 | Unused Connectors - The connectors for the 3.5mm light green and red ports are not configured or active. | |
Installation Steps |
|
See also