Home > Manuals > iQ Whole House Entertainment > IMS Media Server > Configuring the iQ IMS Settings
Configuring the iQ IMS Settings
The iQ system can be configured without installing any software and uses the web server built into the IMS. The IP address is displayed on any panel prior to configuration and also on the front LCD on the IMS. Making changes to the iQ configuration is in real time with altered settings being instantly usable. When a panel or speaker output is assigned to a room, you can immediately use and test that touchscreen and speaker output. There is also a selection box on the right side of the IMS web page that opens an Adobe Flash-based remote modeled after the TS.15 touch screen user interface. This can be used to emulate control, test your settings, and control the system remotely.
Note: With the web port forwarded through the router to the IP address of the IMS, settings such as bass and treble can be modified in real time from a remote location.
Jump to Section Quick Links
iQ Settings
Devices
Device Control
Sources
Source Order
Widgets
Rooms
Accessing the Web Server to Configure iQ Settings

To
connect to the web server open your internet browser and in the address
bar type in the IP address of the unit. In our example, type in
192.168.1.50.

Once the page loads, navigate to the bottom and press iQ Settings.
The system will ask for a user name and password: Username:admin Password:admin
| iQ Settings |
||
 |
Enter the proper Time Zone for your area. |
|
 |
Postal
Code is used to get weather and other widget information. Outside of
the US you must enter a 'Location ID'. To find your Location ID, browse
or search for your city from weather.yahoo.com. The Location ID is in
the URL for the forecast page for that city. For example, searching for
Montreal returns 'http://weather.yahoo.com/forecast/CAXX0301.html' in
the address bar, so the Location ID for Montreal to put in the Postal
Code box would be CAXX0301. |
|
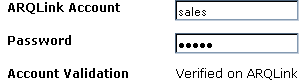 |
Enter
your existing ARQLink account information or register a new ARQLink
account at https://www.arqlink.com/pro/register.php and enter the
account name and password below. |
|
 |
The Update Interval is the frequency that iQ reports to ARQLink. Default is 120 minutes. |
|
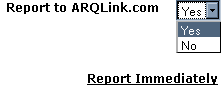 |
Determines if the iQ will report to ARQLink. | |
| Devices |
||
 |
To add a device, click Add Device. |
|
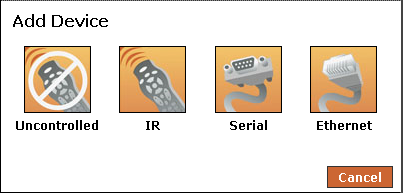 |
Select the type of control for the device you are adding which include Uncontrolled, IR, Serial, Ethernet controlled devices. |
|
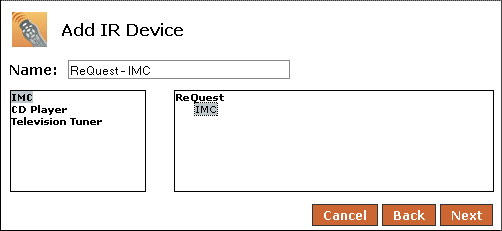 |
From the menu, choose the type, model and name your device. |
|
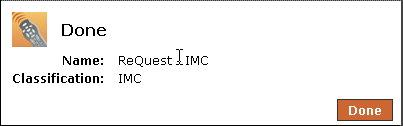 |
Choose Next when you are done. A final box will appear confirming the device has been added successfully, click on Done. Repeat these steps for all necessary devices. |
|
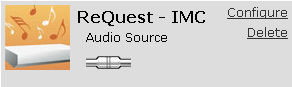 |
To modify the device name or settings, select Configure from the device To remove the device from the configuration, select Delete. |
|
| Device Control |
||
 |
To setup your devices for control, start by selecting a Control Type (Serial or IR) from the tabbed menu. |
|
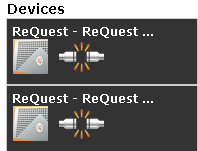 |
The devices associated with the selected control type that are available will be listed. | |
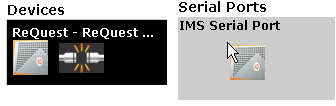 |
Drag and drop the device into the proper port. | |
 |
Once the device has been dragged into the proper port and the system physically detects the connection, the plug icon will now show connected. |
|
| Sources |
||
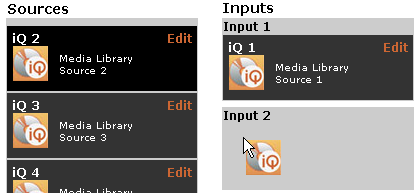 |
The
defined sources can be connected to any of the inputs on the IMA. Drag
and drop each source to the appropriate input on the IMA. |
|
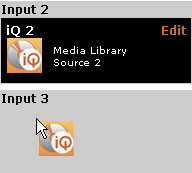 |
Sources and inputs can also be changed later by dragging and dropping them to different inputs. |
|
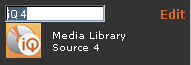 |
To rename the sources, click on Edit, type the new name, and hit ENTER when done. |
|
| Source Order |
||
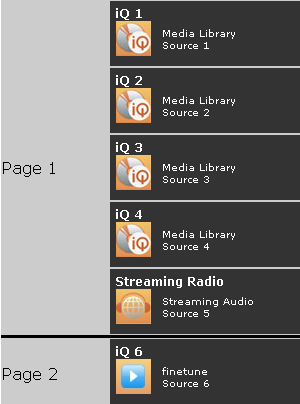 |
TS.35
touch screens can display 5 sources per page. Use the Source order page
to choose the order of the sources and how they are listed on the touch
screens. This insures that the most frequently used sources are
displayed on the first touch screen page and the less frequently used
sources are on the subsequent pages. |
|
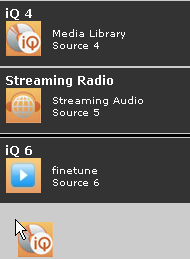 |
To
change the order, drag and drop the source to the desired location. The
new order is displayed on all the touch screens in the system. |
|
| Widgets |
|
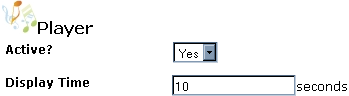 |
The Player Widget displays what is currently playing in the selected room on the iQ. It can either be active or inactive. |
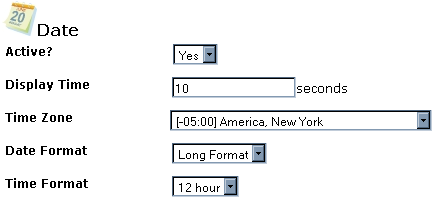 |
The Date Widget displays the current date and time. Select the correct time zone for the iQ and IMC, date format, and time format here. |
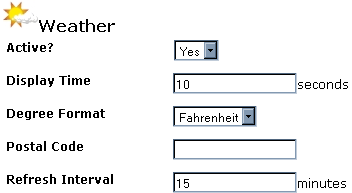 |
The Weather Widget displays the weather forecast. Enter the postal code and temperature format (metric or American). |
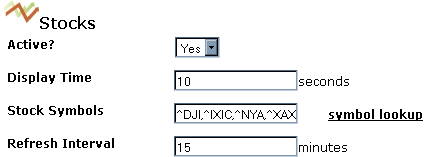 |
The Stocks Widget displays daily stock information. The user can enter the stock symbols they want to display. |
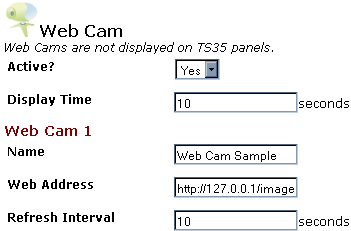 |
The Web Cam Widget can display web cams that publish to a web page. Helpful tip: The only images we can display are still JPGs. To determine the web address, typically right clicking and going to properties on the image will give you the direct link. |
| Rooms |
||
 |
A Room can have multiple touch screens and speaker pairs. Each room is an independent audio zone. A
large Kitchen/Family room space with 2 or 3 pairs of speakers and 2 or
3 touch screens is still considered one Room. |
|
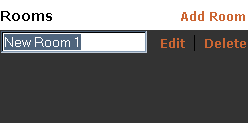 |
Click on Add Room at the top right. A new room will appear. To name it, click Edit, type a new Room Name, and hit ENTER. Only use letters and numbers, no special characters. |
|
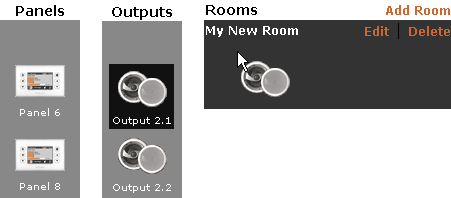 |
To add panels, controllers, and speaker outputs, drag and drop them into the room. Note: A speaker must be in a room for it to be listed in the UI. |
|
See also