Home > Manuals > iQ Whole House Entertainment > IMS Media Server > Configuring the iQ IMS on the Network
Configuring the iQ IMS on the Network
After
installing the server configuration settings can be applied to the
system. This configuration starts with the network and ends with
scheduling the system tasks.
Configuring the Network

Using the 64 button remote, press the MENU button. Using the UP and DOWN arrows, select Network and press ENTER 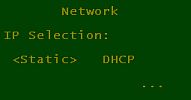
It is always recommended to choose a Static IP. Determine an available static IP address and enter the information displayed on the LCD and video display. 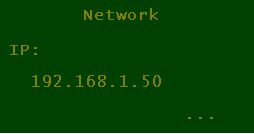
You can do this using the remote number buttons and the LEFT and RIGHT arrows. An example of an IP address is 192.168.1.50. 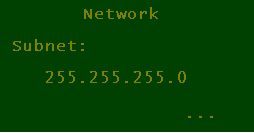
Typically 255.255.255.0 is entered for the subnet. 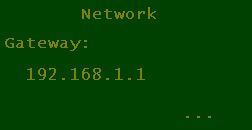
For the Gateway,
enter the IP address of the router. This would have the same first
three number sequences as the IP address with the last ending in 1.
For example: 192.168.1.1. 
For the DNS,
enter the IP address of the router. This is recommended so that the
server depends on the router to keep track of any DNS changes made by
the Internet provider. 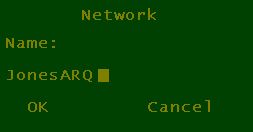
Once
all the IP information has been entered, enter a name for the ReQuest
server. Typically this is the owner's name, or the name of the location
(such as "BeachHouse" or "Aspen").
Finally, use the navigation arrows and select OK and press ENTER.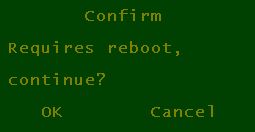
A prompt will appear confirming a reboot is necessary to apply the changes. Select OK and press ENTER. The system will now reboot.
Testing the Network
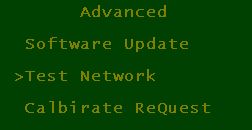
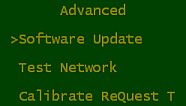
Once the unit has complete the reboot, the network connection needs to be tested. To do so, using the remote press the MENU button. Using the UP and DOWN arrows, select Advanced and press ENTER. Using the UP and DOWN arrows again select Test Network and press ENTER. 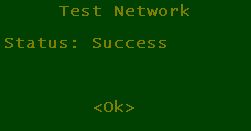
The
test will now ping www.arqlink.com, www.yahoo.com and www.google.com
and display if each was a success. If all were a success the screen
will display the final status of Success. Press ENTER on the remote to exit the screen. 
If the test was a failure you have one of two problems that must be reviewed before proceeding:
Helpful
tip: Sometimes using the router IP as the DNS does not work. Try using
208.67.222.222 instead and running the network test again.
Running a Software Update

After confirming the unit has passed the Network Test, use the remote and press the MENU button. Using the UP and DOWN arrows, select Advanced and press ENTER. Using the UP and DOWN arrows again select Software Update and press ENTER.
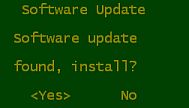
If
there is a software update available the system will prompt the user to
install the new version. Otherwise a message will appear indicating
that the software update was not found/not successful.
Setting up an ARQLink Account
Setting up an ARQLink Account | |
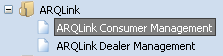 | Using the ARQLink Consumer Management Manual, create an ARQLink account |
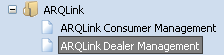 | Using the ARQLink Dealer Management Manual, add the new account to the Dealer ARQLink account |
| Accessing the Web Server to Configure Additional Settings | ||
| The remaining configuration will be done on a computer in the web server hosted by the ReQuest server. | ||
 | To
connect to the web server open your internet browser and in the address
bar type in the IP address of the unit. In our example, type in
192.168.1.50. | |
 | Once the page loads, navigate to the bottom and press Settings. | |
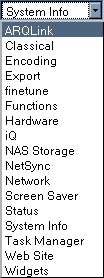 | Using the Serious Play OS manual for the web server settings, adjust settings following this recommended order: | |
See also