DIAGNOSTIC DISC
 ReQuest Diagnostic Disc For Servers ReQuest Diagnostic Disc For Servers
Format: Bootable ISO
Size: 196,335,616 bytes (CD or DVD) MD5: fcdb2c69c7d95cc52759bb82864ea4ed |
ReQuest Diagnostic Disc For MediaPlayers
Format: Bootable ISO
Size: 193,558,528 bytes (CD or DVD) MD5: 800ee36e9f9c97e04ef94282f5332a9a |
Note: This disc will not repair a ReQuest device. It is a bootable CD/DVD (or USB stick) that allows ReQuest engineers to connect to the server and attempt to diagnose the problem. This disc will function even if the internal hard drive on the server has failed. You must have an Internet connection.
YOU HAVE TO CONTACT US VIA THE ONLINE CASE TOOL ONCE THIS IS BOOTED, SO WE ARE ABLE TO RUN SCANS AND PERFORM THE DIAGNOSTICS. THIS DISC DOES *NOT* REPAIR THE SYSTEM.
ReQuest Servers
If you have a ReQuest server with a serial number starting in ARQ5x/IMS5x, ARQ6x/IMS6x, or ARQ7x/IMS7x that is not booting, we may be able to correct this issue remotely using the Remote Diagnostic Disc as described below. This disc will only work on the servers listed or newer.
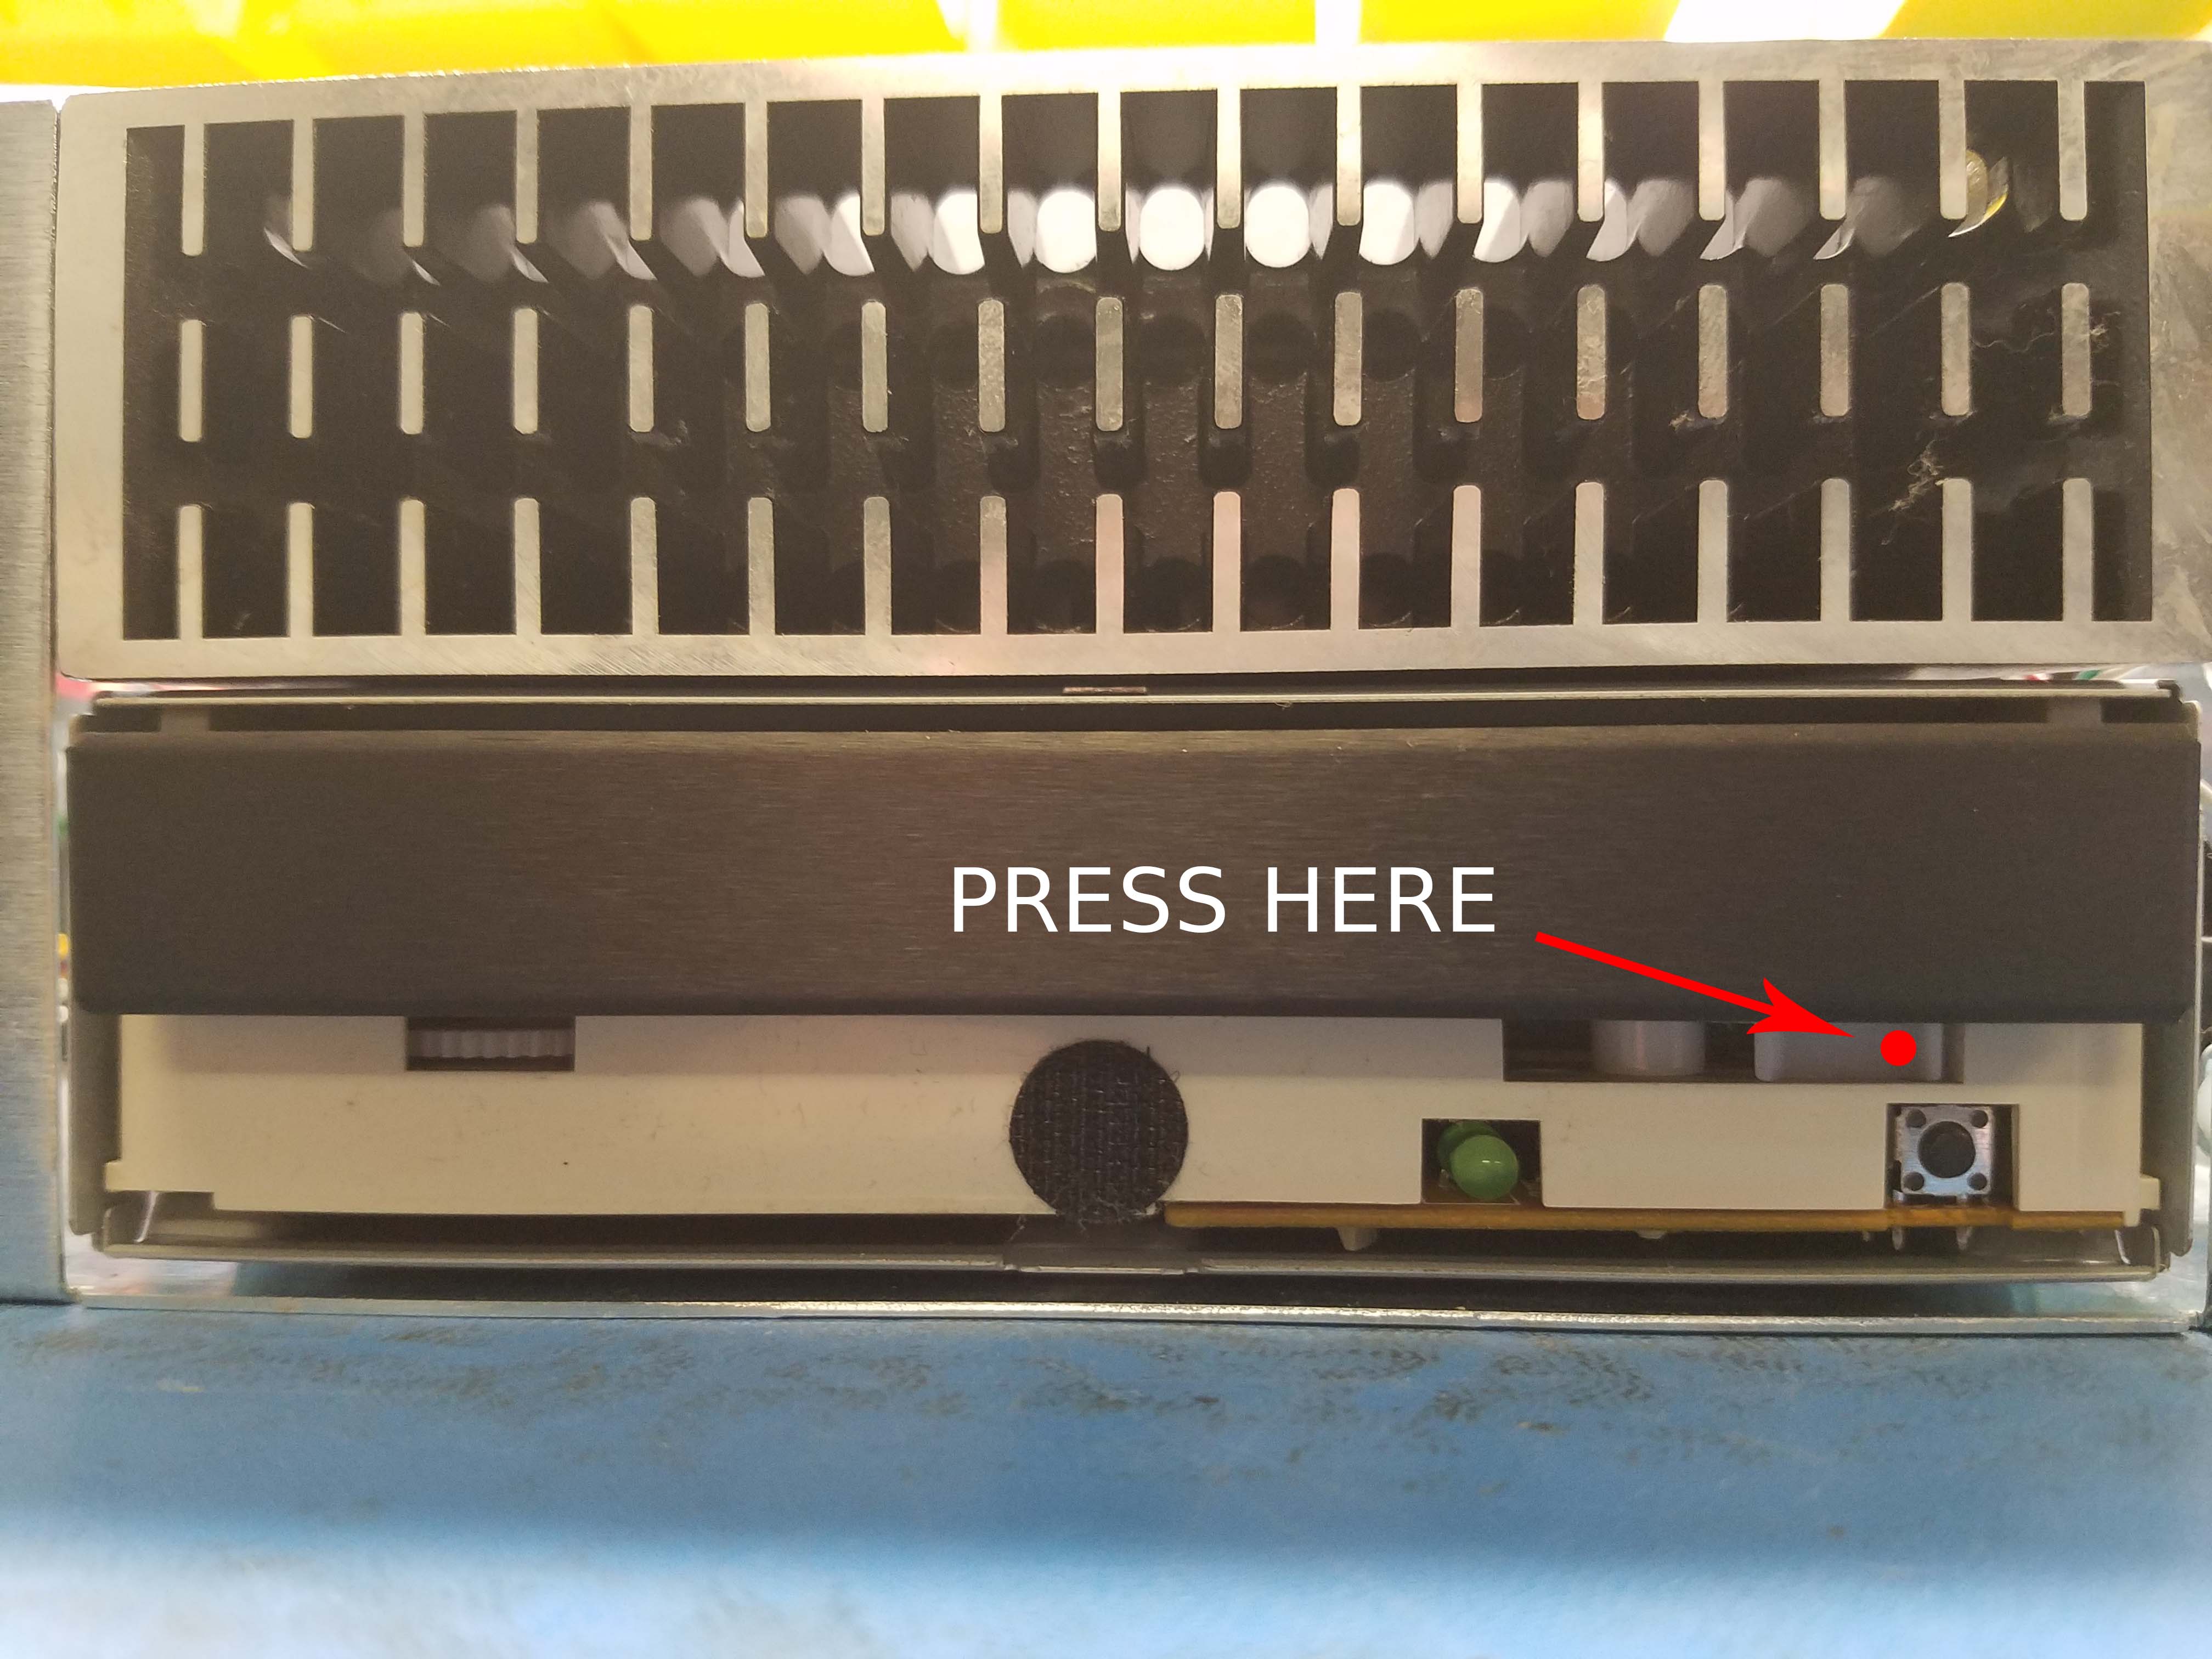
Ejecting the CD tray (ARQ5xxxx/IMS5xxxx)
The CD eject button on ARQ5xxxx/IMS5xxxx servers will NOT operate if the server is not functional. Remove the faceplate and access the actual CD eject button on the drive itself. If that is not functional, you may need to use the "paper clip trick" to release the locking mechanism. This is where the pin hole would be located on a standard, computer optical drive. Push straight in until the tray releases.
ReQuest MediaPlayers
It may also be possible to remotely repair MediaPlayers showing the "Insert bootable disc" or "Operating system not found" message. Download the ISO file and follow the instructions to burn the disc. You may also make a bootable USB drive using a tool such as Rufus. We have an image of the best Rufus settings here.
Creating the ReQuest Remote Diagnostic Disc
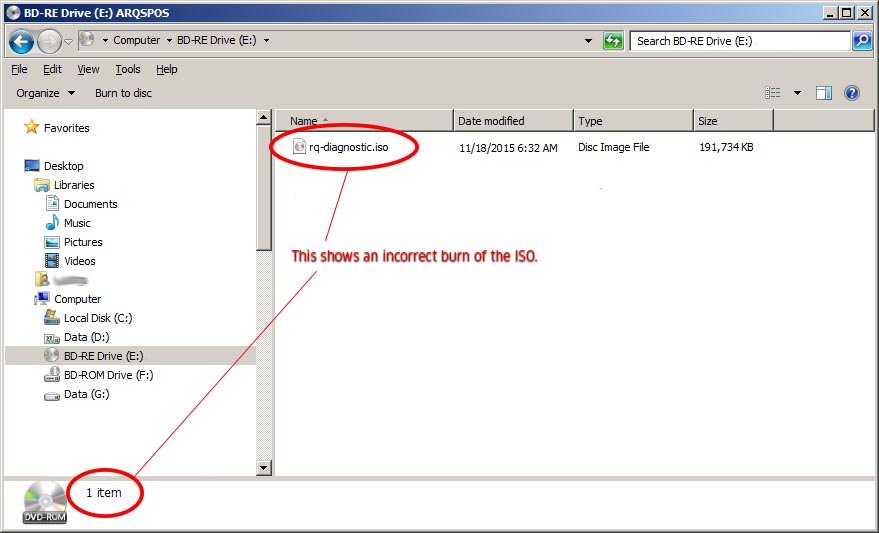
You will need to burn the disc as an ISO image (not just drag the file to a disc, that won't work). An ISO image is an archive file (a.k.a. disk image) of an optical disc using a conventional ISO format that is supported by many software vendors.On a Windows Computer:
- Some Windows versions have ISO burning built-in. If yours does not, you can download a simple ISO burner, Active ISO Burner, from its creator NTFS.com: http://www.ntfs.com/iso-burning.htm
- Insert a blank CD or DVD into your computer's optical drive
- Double-click on the ISO file you downloaded above
- Follow the instructions to create the disc
On a Mac os OSX Computer:
- Insert a blank CD or DVD into your computer's optical drive.
- Start Disk Utility ( It is located in the Utilities folder within the Applications folder).
- From the File menu, choose Open Disk Image and select the ISO to be burned.
- In the list of volumes, you will now see an item representing the ISO file. Select it.
- Click the Burn button and follow the instructions.
Once the CD or DVD is burned, it should contain multiple files & folders (if it just has the .ISO file, then it was not burned correctly). Also, do not attempt to extract the ISO file to the disc. This will create an unbootable and unusable disc.

Using the ReQuest Remote Diagnostic Disc
- Insert thie disc into the ReQuest server DVD-ROM tray or slot. Note: THE EJECT BUTTON WILL NOT WORK WHEN THE UNIT IS NOT FULLY BOOTED TO OPEN THE DVD-ROM DRAWER (you may need to take the faceplate off and use the small manual eject button or the mechanical release lever, both found beneath the DVD-ROM tray).
- Insert the DVD and gently push the tray closed.
- Press the power button and allow the server to power down. You may find you need to hold the power button for up to 5 seconds to power off the unit.
- Confirm the unit is physically plugged into the network and that DHCP is available with access to the Internet.
- Press the power button to turn on the unit.
- The unit should boot from the disc. Messages may or may not appear on the LCD.
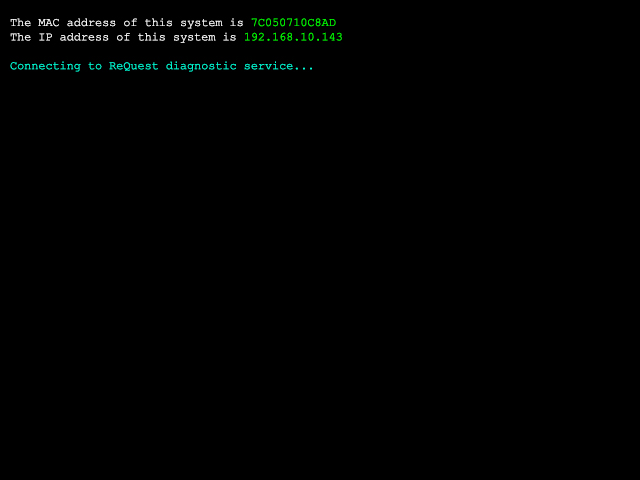
- A VGA monitor is not required, but if you have one connected, you should see the ReQuest logo appear (splash screen)
followed by technical information as the system boots from the disc. This will help you confirm the Diagnostic Disc
is booted and functional.
- Contact ReQuest Technical Support via the online case tool, before 4PM US Eastern Time, as these scans can take up to an hour to run. Please respond directly to this email to contact us.
We will confirm we can connect to the unit and then escalate the case to our Engineering Department to run their tests to try and correct any software issue they may find. This process can take up to one hour. We will contact you with our suggestions once this process is completed.
After we have contacted you about the unit you will need to remove the disc and reboot. To remove the Remote Diagnostic Disc press the power button once. The unit will begin its shut down process that will include ejecting the disc.
After creating this disc, please keep it handy for any future boot issues on V5, V6, or V7 units.

