Home > Manuals > Touch Screens and Control > TS.N Touch Screens > Configuring TS.N Touch Screens
Configuring TS.N Touch Screens
To configure the TS.N to control the F.Series or iQ system running the latest version of SPOS, follow the instructions below. For our previous guide, click here.
| Network Configuration | ||
 | The default configuration of the TS.N
is DHCP. Upon initial boot, the
TS.N will attempt to obtain its IP address and network information
automatically. Typically, the router that the TS.N is connected to
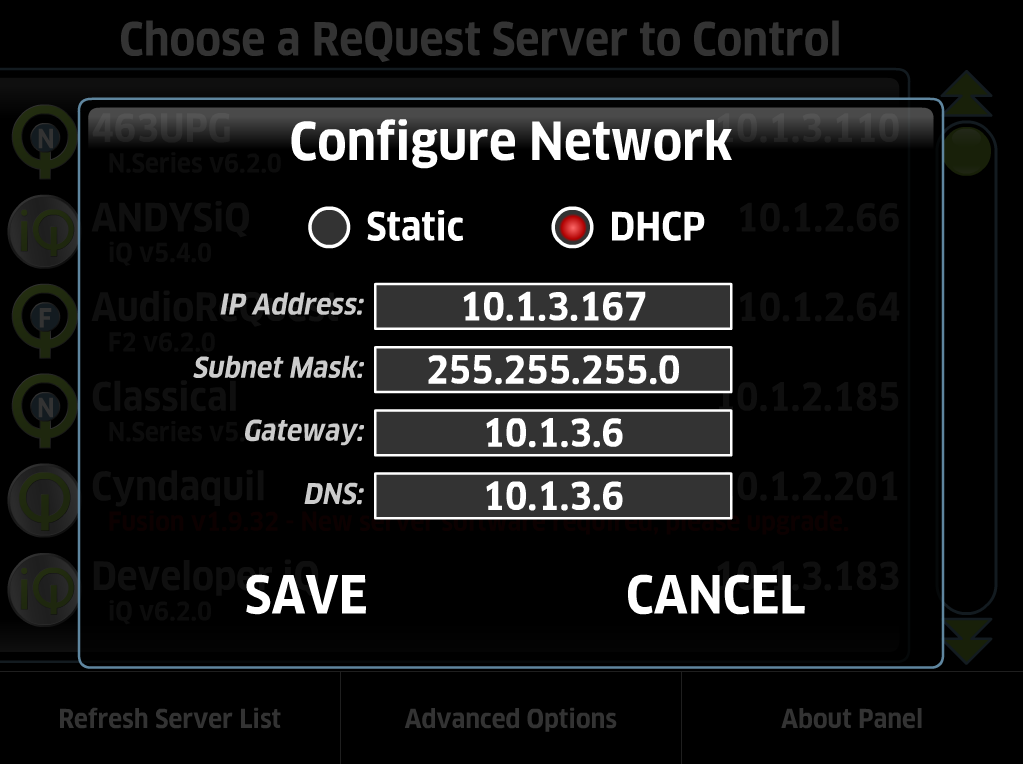
provides this DHCP service. The Configure Network dialog is displayed if the TS.N detects a network error when it starts up. This can happen if the TS.N is not connected to the network or if the router is not supplying a DCHP service. | |
 | If there is no DHCP
service available at all, the Static network information for the TS.N
must be entered manually. If the TS.N is currently using static
network settings, it can be returned to use DHCP in the
Configure Network window; the TS.N will then confirm that it should
reconfigure itself to use DHCP (which will require a reboot). The Configure Network screen can also be displayed by pressing the Advanced Options at the bottom of the screen and then Configure Network. | |
 | If the TS.N cannot acquire it's network
configuration from a DHCP or you would prefer to configure with a static IP, then its network must be configured
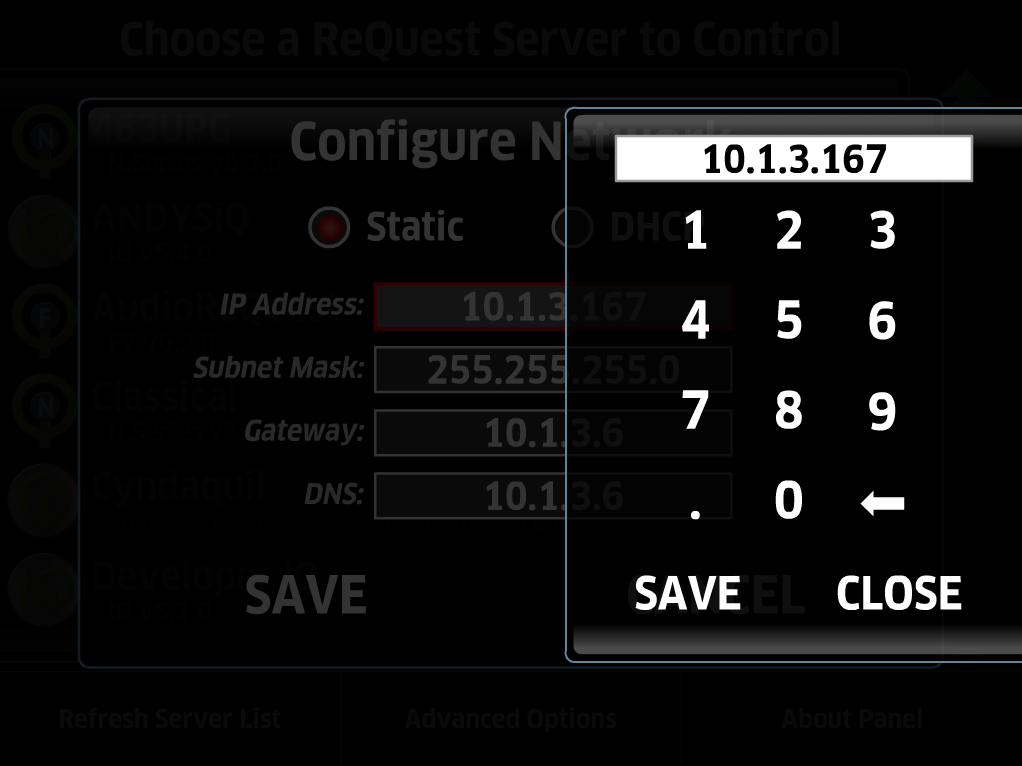
statically. After selecting Configure Network under the Advanced Options, by selecting the radio button labeled Static, the IP information can be manually configured. By selecting each line of network information, a pop-up window will appear where the information can be entered. | |
| Configuring with Server | ||
| If its network is configured, the TS.N will attempt to identify all ReQuest servers connected to its network every time it boots. Not all ReQuest servers know how to communicate with a TS.N; if the TS.N only finds a single ReQuest server that it can connect to, it will automatically connect to that one. If the TS.N finds several ReQuest servers that it can connect to, it will automatically reconnect to whichever server it was most recently connected to. If the TS.N does not find any ReQuest servers that know how to communicate with it, or if it has never connected to any of the servers on its network, the TS.N will show the Choose a ReQuest Server to Control screen instead. | ||
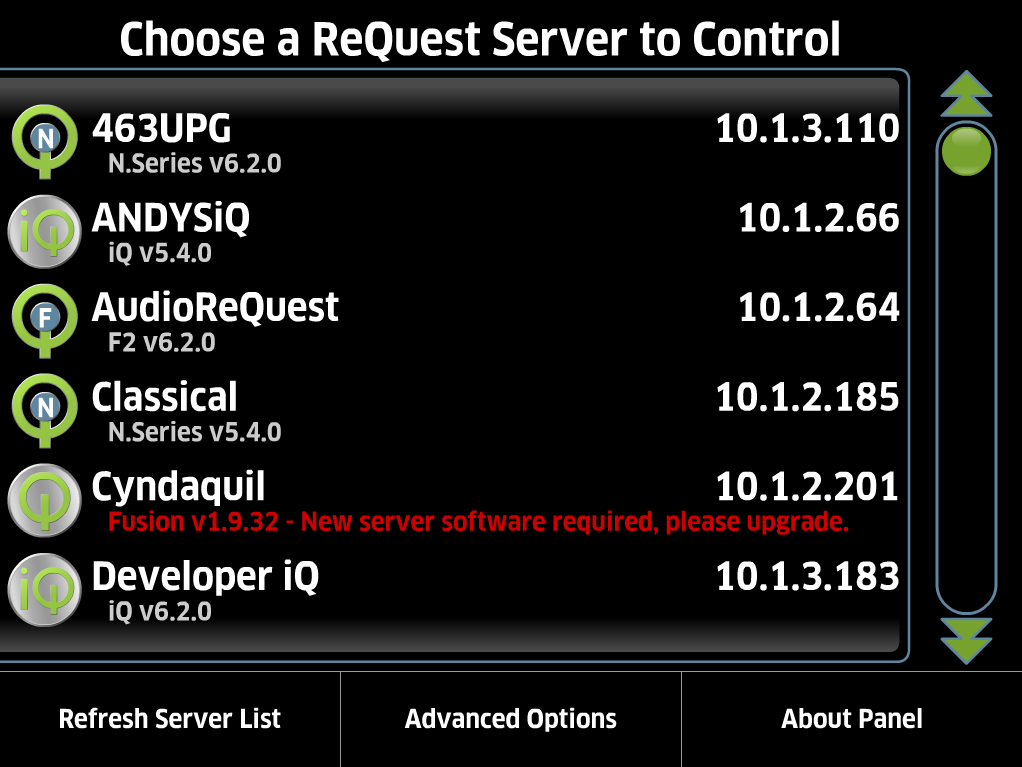 | All servers that the TS.N is able to locate will be listed in the Choose a ReQuest Server to Control screen. This is the main screen of the TS.N. The server selection screen is shown when one exits from a ReQuest server, or if the TS.N does not know to which ReQuest server it should connect. By selecting a ReQuest server, it will launch that server’s user interface. If the firmware of the server needs to be upgraded before it knows how to communicate with the TS.N, its line will be flagged appropriately, and pressing on that line will have no effect. | |
 | Pressing the button labeled Refresh Server List will cause the TS.N to re-examine its network and the servers it discovers. If a ReQuest server was not fully booted when the TS.N boots, or if the ReQuest server’s firmware is upgraded, this will allow the TS.N to connect to it. The TS.N will not automatically connect when this button is pressed; it only automatically connects to a server when it boots. | |
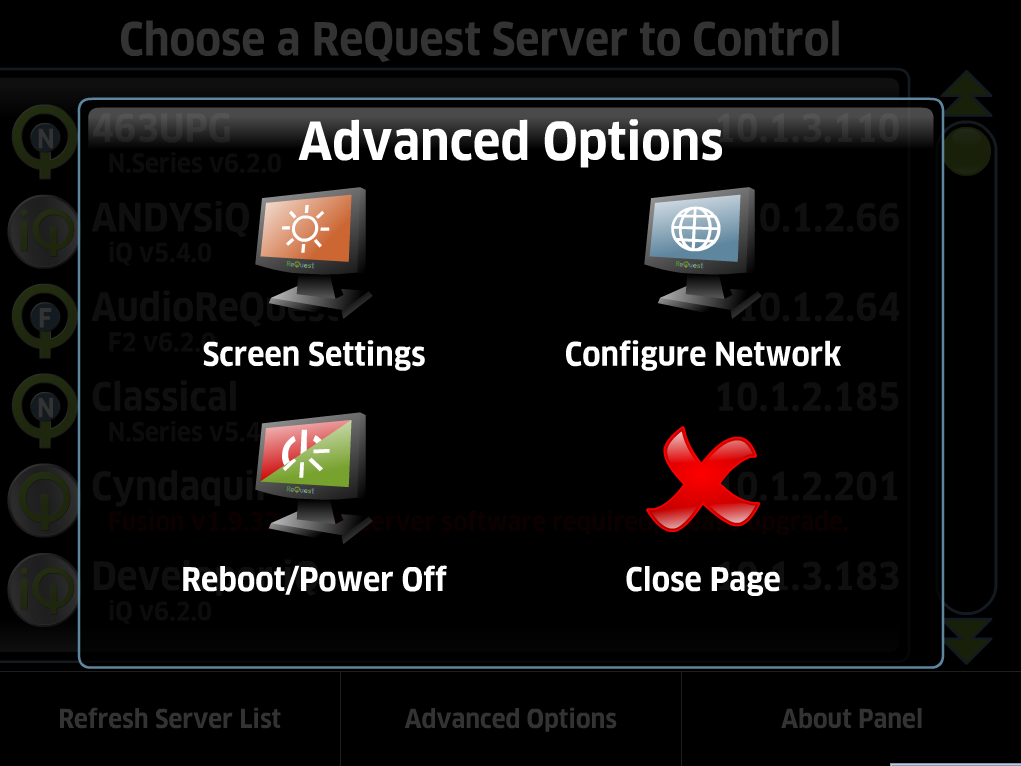
 | Pressing the button labeled Advanced Options will display a pop-up with additional available functions. | |
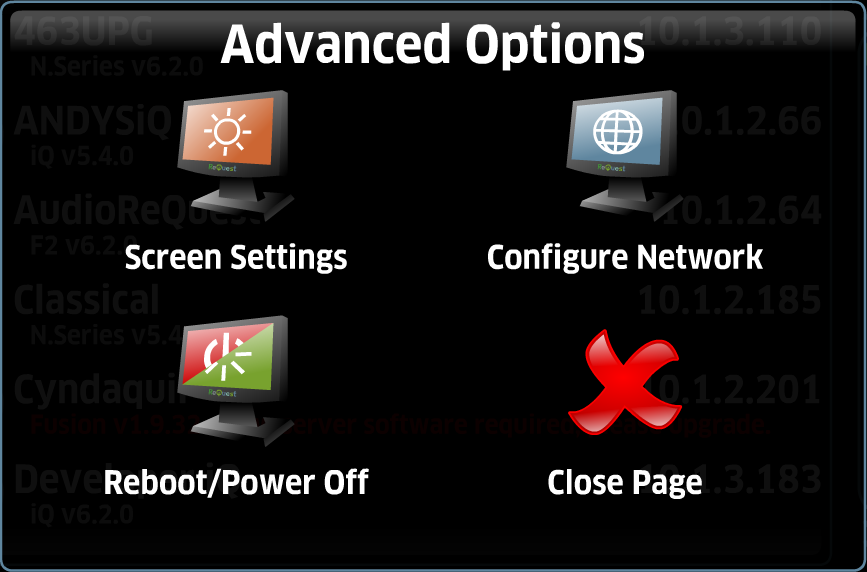 | The Advanced Options include:
| |
 | Pressing the About Panel button will display panel specific settings which include the Panel Model, Serial Number, MAC Address, IP Address and ARQLink Domain. | |
See also